DIY Raised Garden Beds on a Budget
Build durable, productive raised beds for less with repurposed materials, smart sizing, and soil-saving tips. Step-by-step guide for any yard.
Getting Started on a Shoestring
Building raised garden beds on a budget starts with clarity about what you truly need. Focus on a compact footprint, a sunny spot with at least six hours of light, and materials that balance durability with cost. Raised beds warm up faster, improve drainage, and concentrate nutrients, so even a small structure can yield impressive harvests. Begin by defining goals: herbs for the kitchen, salad greens, or space for fruiting crops. A clear plan helps avoid impulse purchases and waste. Sketch the layout, noting pathways you can comfortably navigate with a wheelbarrow. Keep tools simple: a hand saw, drill or screwdriver, measuring tape, level, and gloves will cover most builds. Reuse what you already own, borrow what you can, and buy only essentials. Prioritize soil quality over fancy trim; plants care more about soil health than picture-perfect corners. With a thrifty mindset, you can transform overlooked corners and salvaged supplies into a productive, good-looking garden.
Smart, Low-Cost Materials
Budget-friendly beds begin with creative sourcing. Seek reclaimed lumber, salvaged fencing, or offcuts from building sites, and look for pallet boards stamped HT (heat-treated) rather than chemically treated. Untreated softwood is affordable and, when kept mulched and well-drained, can last for several seasons; extend its life by sealing exteriors with food-safe finishes like raw linseed oil. Concrete blocks or bricks stack easily, add thermal mass, and require no cutting. Corrugated metal panels paired with a simple wood frame create lightweight, long beds that resist rot. If buying new, compare costs per linear foot and factor in hardware. Choose weather-resistant screws over nails for longevity and easier repairs. For corners, repurpose scrap posts or use metal angle brackets. Avoid questionable coatings when growing edibles; prioritize food-safe surfaces where soil meets material. Keep an eye out for community swaps, curbside giveaways, and dismantled decking. Matching materials across beds is nice, but consistency in height and function matters more than aesthetics when saving money.
Design That Saves Money
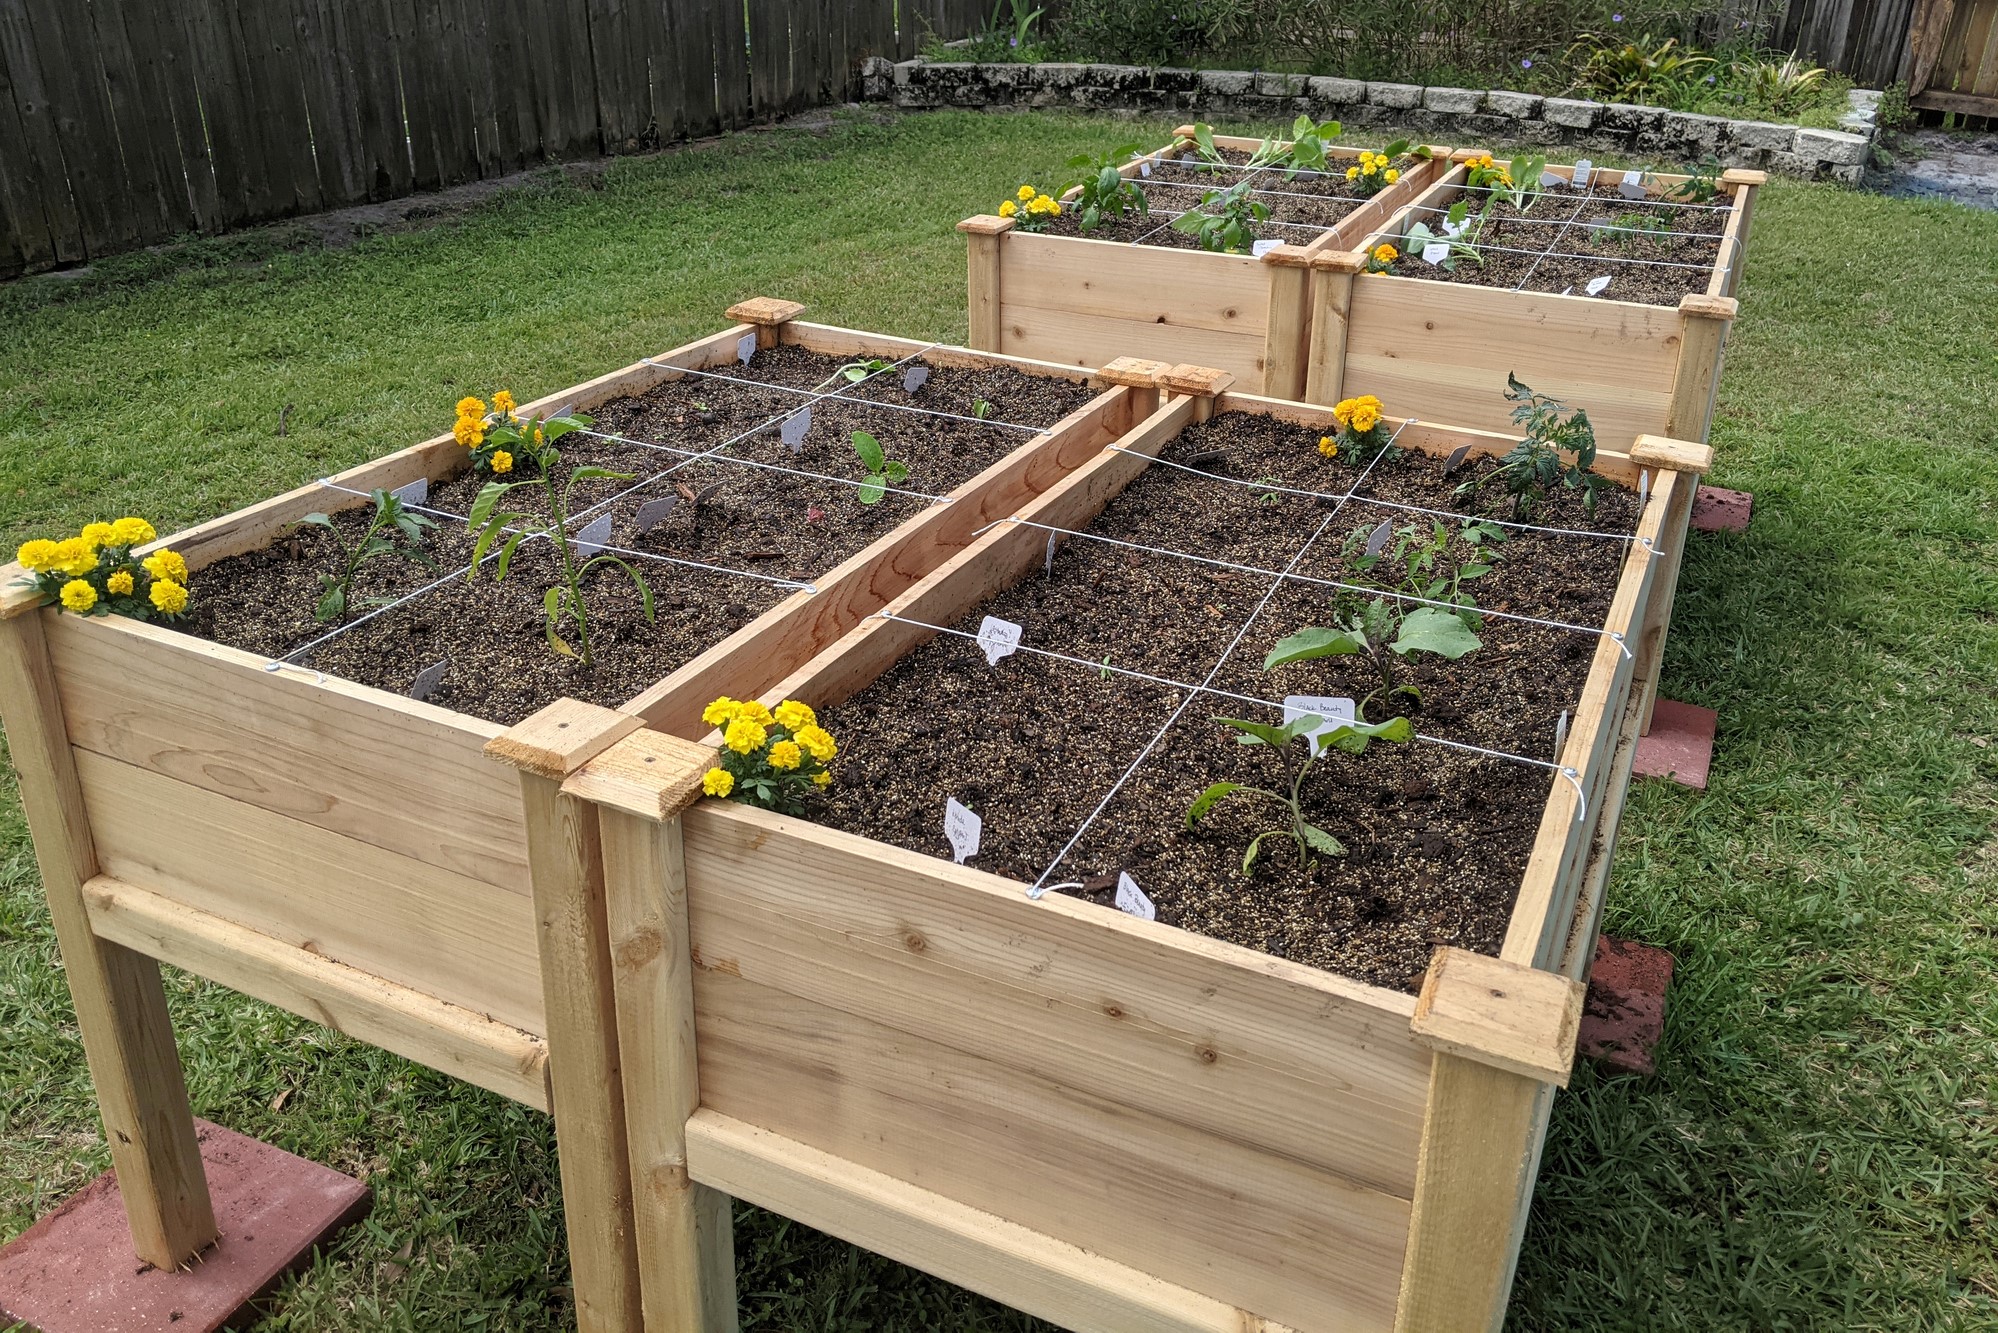
A smart design stretches every dollar. Keep bed widths around four feet so you can reach the center without stepping on the soil, preserving structure and minimizing compaction. Length can be as long as space allows, but more, shorter beds often improve access and crop rotation flexibility. Heights between eight and twelve inches work for most crops; deeper beds help root vegetables but require more fill. Orient beds to maximize sun while avoiding shade from fences or shrubs, and leave sturdy paths—wide enough for a wheelbarrow—and cover them with mulch or cardboard to suppress weeds on the cheap. Start with one or two beds, then expand as your budget grows. Place beds on level ground; if your site slopes, terrace gently to prevent runoff. Layer cardboard or newspaper under the frame to smother grass, then top with soil. Include simple trellis points on the long sides for vertical crops; planning these supports now prevents costly retrofits later.
Simple Build Steps for Sturdy Results
Assembly is straightforward when you break it into steps. Cut boards to length, square the ends, and dry-fit the frame. Pre-drill holes to prevent splitting, then fasten corners with exterior screws and optional angle brackets for strength. Check for square by measuring diagonals; adjust until both are equal. Level the frame on the ground using a long level or straight board, shimming low corners with gravel or offcuts. For added durability, set short stakes inside corners and along long runs to prevent bowing when soil settles. Line the inner walls—not the bottom—with heavy landscape fabric to reduce direct soil contact and slow rot while preserving drainage. If using metal panels, add a protective top rim for safe handling. Rake the interior smooth and slightly mound the center so water moves outward. Fill gradually, watering layers as you go to settle voids. Keep hardware simple and standardized; buying one size of screw in bulk lowers cost and speeds future repairs.
Fill for Less: Budget Soil Strategy
Great crops grow from great soil, not expensive bags. Start with a layered approach that builds fertility over time while cutting costs. Begin with coarse, woody material on the bottom—small branches, twigs, and pruned stems—to promote air pockets and long-term drainage. Add a layer of brown, carbon-rich matter like dried leaves or shredded cardboard, then a green layer such as grass clippings or kitchen scraps free of meat and oils. Cap with a blend of affordable topsoil and quality compost; a mix near sixty percent topsoil and forty percent compost works well for most beds. Screen out debris as you fill, and moisten layers so they knit together. Avoid using soil from unknown sites that may carry contaminants. Refresh the top few inches each season with new compost, worm castings, or well-rotted manure. A simple squeeze test—moist soil forming a crumbly ball—tells you the texture is right for healthy roots and robust microbial life.
Water and Mulch Without Waste
Efficient watering and mulch turn a frugal build into a low-maintenance success. Water deeply but less often to encourage strong roots; aim for even moisture rather than daily splashes. A soaker hose or simple drip line conserves water and delivers it right to the root zone. On a tight budget, repurpose food-grade bottles as slow-release emitters or sink unglazed pots to act as reservoirs. Finish with a generous layer of mulch—shredded leaves, straw, or wood chips—to reduce evaporation, regulate soil temperature, and block weeds. Keep mulch a small gap from stems to prevent rot. Collect rainwater in clean containers where permitted, and water in the morning to reduce losses. In hot spells, lightweight shade cloth or improvised screens protect tender crops. Regularly check soil a few inches down; adjust watering before plants show stress. Good mulch and mindful irrigation save money, time, and plants, turning modest inputs into reliable, thriving growth.
Plant, Maintain, and Stretch Value
Make every square inch count with smart planting. Use succession planting to follow fast crops like radishes with beans or greens, and practice companion planting—tuck basil near tomatoes or lettuces under taller trellised vines. Train climbers vertically with simple twine and stakes to free ground space. Rotate plant families each season to manage pests and soil fatigue. For low-cost protection, try floating row covers, mesh, and simple collars around seedlings. Handpick pests early, encourage beneficial insects with diverse blooms, and mulch to reduce weeds before they start. Feed lightly with compost tea or slow-release organic amendments when plants look hungry. Save seeds from open-pollinated favorites and root cuttings from herbs to expand stock at no cost. At season's end, top up beds with compost, inspect fasteners, and reseal exposed wood if needed. Keep notes on what thrived and what struggled; continual refinement is the surest budget tool of all.