The Beginner's Guide to Building a PC
Learn how to plan, pick parts, and assemble your first desktop PC: budgeting, compatibility, tools, step-by-step build, BIOS, and Windows setup.
Planning Your Build
Building your first PC starts with a clear plan. Begin by defining your budget, intended use case, and desired upgrade path. A gaming and content creation machine has different needs than a quiet home office system, so list your priorities: frame rates, responsiveness, silence, or compact size. Match your goals to a form factor such as ATX, Micro‑ATX, or Mini‑ITX, remembering that smaller cases can limit cooling and expansion. Consider your monitor's resolution and refresh rate, because display demands set expectations for your CPU and GPU. Create a component checklist, including motherboard, memory, storage, power supply, case, and cooling. Plan for an operating system, peripherals, and backup solutions. Prepare a tidy workspace, a magnetic screwdriver, and basic anti‑static habits, like touching grounded metal before handling parts. Research compatibility for socket, memory type, and case clearance, and sketch a rough build order. Good planning reduces surprises, keeps costs under control, and helps you choose parts that work together smoothly.
Choosing Core Components
Start with the CPU, which sets performance contours for gaming, creation, and multitasking. Pair it with a motherboard that matches the socket and offers the features you want: reliable VRM design, enough USB ports, fast storage lanes, and networking options. Select memory with appropriate speed and capacity for your tasks; dual‑channel configurations often deliver better real‑world performance than a single stick. Check the board's qualified vendor list for memory type and supported speeds, and plan for future capacity if you expect growth. Decide whether you need integrated graphics or will rely on a discrete graphics card later. Think about chipset capabilities, BIOS update support, and how many M.2 slots you will use. Balance the budget by investing most where your workload benefits most: CPU for simulation and code, graphics for high‑refresh gaming, and memory for heavy multitasking. Aim for a well‑rounded platform that avoids bottlenecks while leaving headroom for later upgrades.
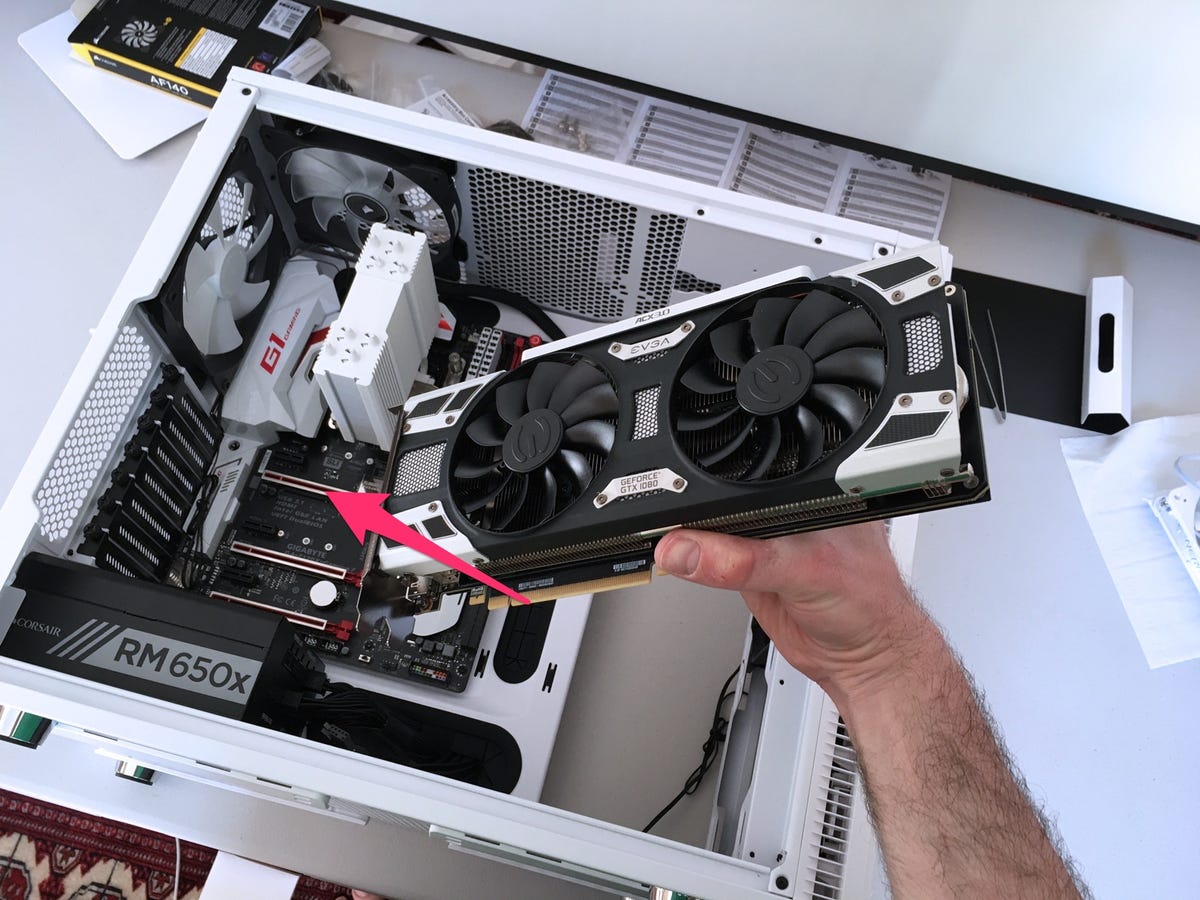
Graphics, Memory, and Storage
A dedicated graphics card accelerates 3D games, creative workflows, and GPU‑assisted apps, while integrated graphics can handle light gaming and media playback. Choose a GPU with enough VRAM for your target resolution and texture complexity, and ensure your case and power supply can support its length and power draw. For memory, 16 GB is a practical baseline for general use, while creators and heavy multitaskers benefit from 32 GB or more; prioritize stable timings and verified compatibility. For storage, prefer an NVMe SSD for the operating system and frequently used apps, as it offers faster boot and load times than older interfaces. Add a larger SATA SSD or hard drive for libraries, footage, or backups. Consider a two‑drive strategy: one fast system drive and one bulk drive, so maintenance and upgrades are easier. Keep some free space for wear leveling and performance, and plan a simple, automated backup to protect your work.
Case, Cooling, and Power
Your case shapes airflow, acoustics, and ease of building. Look for solid airflow paths with front intake and rear or top exhaust, dust filters that are easy to clean, and room for cables behind the motherboard tray. Choose fans that match your case size, commonly 120 mm or 140 mm, and arrange them to favor slight positive pressure to reduce dust. For the CPU cooler, quality air towers are simple and reliable, while liquid AIO units can move heat directly to case exhaust; either works when sized correctly. Apply a small, even layer of thermal paste and avoid overtightening. Select a power supply with sufficient headroom for peak loads, efficient operation under typical use, and protections like OCP and OVP. Modular cabling improves tidiness and airflow. Plan cable routes early, using the shortest paths and gentle bends. Quiet, cool operation comes from balanced components, clean filters, and a thoughtful fan curve.
Assembly and First Boot
Lay out parts, read quick start guides, and proceed methodically. On the motherboard, install the CPU, apply thermal paste if the cooler is not pre‑applied, mount the cooler, and insert memory in the recommended slots for dual channel. Install M.2 SSDs with their standoffs and heatsinks. Prepare the case by adding standoffs, fans, and the I/O shield if required. Lower the motherboard in gently, align with standoffs, and tighten screws in a cross pattern. Install the power supply, route the 24‑pin, CPU power, and PCIe cables, then seat the graphics card and storage drives. Connect front panel headers carefully, referencing the diagram for polarity. Double‑check every connector, ensure no cables touch fans, and perform a quick pre‑power inspection. On first boot, enter firmware settings, update to a stable release, enable memory profiles, set boot order, and verify temperatures and fan detection. Then install the operating system from a prepared USB drive.
Troubleshooting and Upgrades
If the system does not POST, simplify. Power down, reseat the memory and graphics card, try one memory stick in the primary slot, and verify the 8‑pin CPU power connector is locked. Clear CMOS to reset problematic settings, and use the motherboard's debug LEDs or beep codes to narrow issues. Inspect standoffs to ensure no stray support is shorting the board, and confirm the cooler is not over‑tightened. Once the system boots, monitor temperatures and voltages, update drivers and firmware, and run light stress tests to validate stability. Configure fan curves to balance noise and thermals. For maintenance, periodically clean filters and heatsinks, check storage health, and keep backups current. Future upgrades are straightforward: add memory capacity, increase storage with another NVMe or SATA device, or step up to a faster graphics card if the power supply allows. A well‑planned foundation turns each upgrade into a simple, satisfying improvement.